
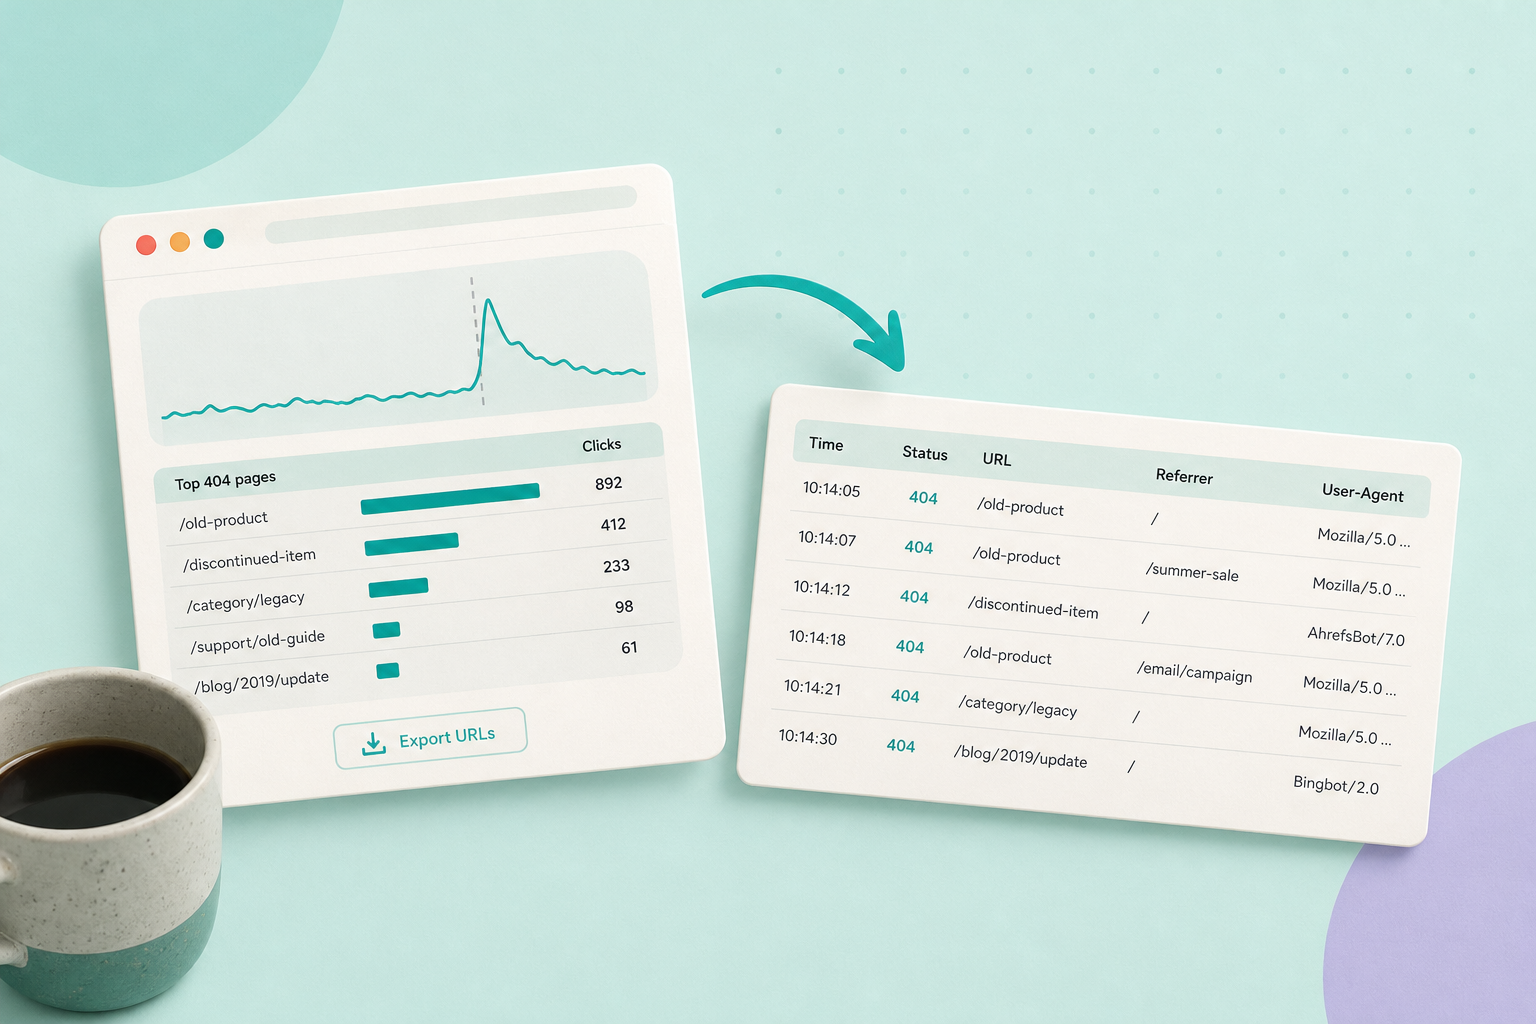
If you see a sudden spike in 404s, start by exporting the affected URLs from Search Console for the exact date range and matching them to your server logs for the same window. That correlation — timestamps, response codes, referrers and user‑agents — tells you whether the traffic is from real users, an internal link, an external site or a bot, and steers your next decision.
In this guide
- Prepare and scope the spike
- Step 1 — Identify affected URLs in Search Console
- Step 2 — Correlate exported URLs with server logs
- Step 3 — Look for pattern clues
- Step 4 — Check recent site changes and redirects
- Step 5 — Decide remediation
- Step 6 — Test fixes on a small sample
- Step 7 — Request reindexing and monitor
- Step 8 — Clean up and prevent regressions
- Fictional example
- Quick checklist
Prepare and scope the spike
Before you start: confirm you (or someone on your team) have a Search Console property with access and a way to read or request the site’s server logs. Use Search Console to find the spike date/time window and filter logs to that same period — precise time alignment is the heart of reliable correlation. See Google’s overview of Search Console reports and URL inspection for where to start: Getting started with Search Console.
Step 1 — Identify affected URLs in Search Console
- Open the Coverage report (or the legacy URL errors if present) and the Performance report to spot when the 404 counts rose.
- Use the URL Inspection tool to check individual URLs. Export the list of affected URLs for the spike window so you have an exact set to match against your logs. The Search Console UI’s URL Inspection tool can be used to request reindexing (via the UI’s “Request indexing” action when available). The URL Inspection API (index.inspect) lets you retrieve a URL’s index status programmatically but does not provide a method to request reindexing: URL Inspection API / tool.
Step 2 — Correlate exported URLs with server logs
For the same timestamp range, find server-log lines for those exported URLs. For each matching request record the:
- request timestamp (UTC or your site timezone),
- response code returned to the client,
- user‑agent string (to help spot crawlers or known bots), and
- referrer header (to see whether an internal page or an external site linked to the missing URL).
Do not rely on Search Console alone for root cause — it reports symptoms and which URLs Google attempted to crawl. Use the server logs to see who actually requested the path and what your server returned. Google documents how to interpret crawling outcomes and common crawling errors: Troubleshoot crawling errors and unreachable URL guidance: Google: URL unreachable examples.
Step 3 — Look for pattern clues
Group the 404s to find patterns that point to a cause:
- path prefix or file‑type clusters (e.g., /old-shop/ or .pdf requests),
- same referrer for many requests (an internal link or an external site),
- identical user‑agents and fast request rates (likely a crawler or scanner),
- timestamps showing a sudden start after a deploy or plugin update.
These patterns narrow the plausible causes and the appropriate fix.
Step 4 — Check recent site changes and redirects
Compare the spike window to your change log, deploys, plugin updates, or any edits to permalink rules or redirect rules. For WordPress sites a permalink or rewrite-change can produce many 404s; refresh or flush rewrite rules and check permalinks guidance: WordPress migration & URL changes and the technical WP rewrite reference: WP_Rewrite class. Also verify whether server-managed redirects (.htaccess, nginx rules) or redirect plugins were altered.
Step 5 — Decide remediation
Choose a remediation per URL or pattern. Use Google’s guidance on HTTP status codes and crawler behaviour when deciding between restore, redirect, or letting a URL stay removed (404/410): HTTP status codes and Googlebot.
Page removed by mistake
When to restore: Restore the original content so the URL returns 200.
When to use a 301 redirect: Not appropriate for an accidental removal — restore instead.
When to return 410/404: Not appropriate.
Content permanently moved to a new URL
When to restore: Only restore the original if you must keep that exact URL available.
When to use a 301 redirect: Use a 301 to the new canonical URL to preserve user experience and link value.
When to return 410/404: Not appropriate.
Page intentionally removed, no replacement
When to restore: Not appropriate.
When to use a 301 redirect: Only if a clear, relevant alternative significantly improves user experience.
When to return 410/404: Return 410 or 404 so crawlers stop retrying (410 signals permanent removal).
Step 6 — Test fixes on a small sample
Apply fixes to a representative subset of high‑value URLs first. Verify each corrected URL returns the intended status (200, 301 target, or 410). Use browser checks or a simple HTTP inspector to confirm the server response before rolling out broad changes. Avoid blanket redirects without checking whether the new target matches user intent and preserves link equity.
Step 7 — Request reindexing and monitor
For important corrected pages, submit them via the Search Console UI’s URL Inspection tool and use the UI’s “Request indexing” action when available to ask Google to re-crawl. The URL Inspection API (index.inspect) can be used to check a URL’s index status programmatically but it does not provide a way to trigger reindexing: URL Inspection API / tool. Then monitor two sources over the next days:
- Search Console Coverage and Performance reports to see whether Google re-crawls and the reported 404 counts decline, and
- server logs to confirm incoming requests now receive the intended responses (and that referrers or crawlers have changed behaviour).
Remember that Search Console reports are not instantaneous; allow a few days for crawl activity and reporting to reflect your fixes.
Step 8 — Clean up and prevent regressions
- Update sitemaps to remove obsolete URLs and include new targets.
- Fix internal links discovered in step 2 so you don’t keep advertising removed URLs to crawlers or visitors.
- Document the root cause and the fix in your change log and add an alert (log‑based or uptime monitor) for future unusual 404 growth.
Fictional example
Fictional shop: After a theme/permalink change the owner sees hundreds of 404s for /old-shop/ paths. They exported the spike period from Search Console, matched the exported URLs to server logs and found most requests came from a popular category page that still linked to the old paths. The owner updated those internal links and added targeted 301 redirects from the old paths to the new product URLs for the shop’s best sellers. They submitted three corrected product URLs with the URL Inspection tool and monitored Search Console Coverage and their logs for several days to confirm the 404s fell for those high‑value pages.
Quick checklist (run this in order)
- Note the spike date/time from Search Console and export the affected URLs. Search Console: start
- Obtain server logs for the same time window and match requests by timestamp and URL (collect timestamp, response code, user‑agent, referrer).
- Group 404s by pattern (path prefix, referrer, user‑agent) to narrow cause.
- Check recent deploys, plugin updates or permalink/rewrite changes; verify redirect rules and sitemaps.
- Decide per URL: restore, 301 redirect, or return 410/404 (use HTTP status guidance). HTTP status guidance
- Test fixes on a small sample and confirm server responses before full rollout.
- Request reindexing for priority pages via URL Inspection and watch Search Console + logs for changes.
- Update sitemaps/internal links and add monitoring to detect future spikes.
Related reading: When to use rel=canonical vs 301 redirects for product pages and Before you remove a WordPress plugin, check what depends on it.